Sunday, December 31, 2017

My Best Trees of 2017 - Moringa!

When I look back over the year and think of what trees were my biggest producers the moringa trees win hands down.  Nearly every day moringa is a part of my diet, either the leaves, the pods, or the powder made from dried leaves.  So it seems odd to me when people ask "what do you DO with moringa?".

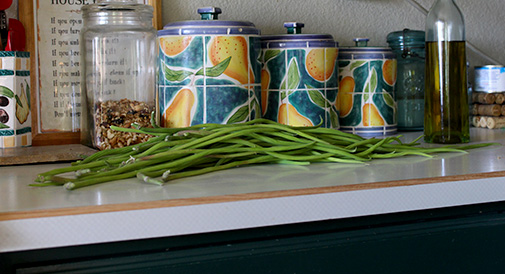
Moringa Pods - We cut the pods while they are young, if you wait too long they get woody like overgrown okra.  We cut it into 2 inch lengths, boil them in vegetable broth for 15 min or so, til tender, serve them warm sprinkled with nutritional yeast and they taste somewhat like asparagus.  They are very versatile and can be used as substitute in any recipe calling for green bean or asparagus, for a meal with more protein. Again, you MUST pick them when they are young, tender, and skinny.  In India they do eat the larger pods, they call them drumsticks, but it is more of an acquired taste.


Putting Mom to work harvesting moringa leaves.
Moringa Leaves-

They can be added to any recipe calling for fresh greens such as spinach or chard, but use in moderation.  Moringa leaves are potent and can be cleansing, like wheat grass. If you have too much at once you will be running to the john too often to count.  So, if you are cooking the leaves, eat 1/2 to 1 cup per serving, and if you are eating fresh in a salad, eat 1/4 cup or less per serving, (so combine it with other greens).

Pick the leaves when they are young and bright green.  I add them to soups, stir fry's, casseroles, and even smoothies.

You can freeze leaves and pods for later use. We cut and blanch them first before freezing.

Moringa Powder - You can also dry the leaves to use for tea, or save as dry crumbles to reconstitute later in a stir fry or soup, or grind the leaves into powder.

I clean the branches then hang in small bunches to dry.  When dry I crumble some leaves to keep in a jar and sprinkle in to any recipe or dish.  But most of the dried leaves I use to make moringa powder.  We swipe down the dry branches to remove the leaves into a bowl, then grind the leaves in the blender into a fine powder.  You might still have to sift out a few dry twigs before storing in jars.

I try to have a teaspoon a day of moringa powder, usually in the morning added to a smoothie or juice.  The powder is potent too, so ONE TEASPOON is plenty.

Smoothie

1 tsp dry Moringa

1 cup almond milk

1/2 frozen banana

Cardamom

Cinnamon

Turmeric powder


Even the flowers are edible, great to dress up a salad!


Seeds Available locally -  Jake Mace


Wednesday, October 25, 2017

Tour of A Tropical Concept Nursery

Hummingbird feeding on nectar of banana blossoms.

Wow!  Look at all of those
bananas!
In September I went on an awesome tour of A Tropical Concept Nursery in Phoenix.  What a place!  It is a unique combination nursery/jungle/bird rescue/animal rescue and all around fun place to hang out and talk tropical plant care, bird care, and even pot belly pig care.  There I found the biggest and healthiest banana trees and plumeria I have ever seen in Arizona.  The owners, Kim and Danny Vallen, and their employees, were so friendly, helpful and knowledgeable about tropicals. You can tell this is not just their day job, it is their passion!

Kim gave a very informative demo on planting a Mango tree.  She used a 50/50 mix of native soil, and organic mulch. Then she watered well, added vitamin B1 to prevent transplant shock, and then added a thick mulch layer of just straw.  Kim advised against using wood chips as mulch because they heat up as they break down.  She also advised to pick flowers and fruit from young trees to give the plant a chance to focus on developing roots.  Makes sense!
Owner, Kim Vallen, giving a demonstration on how to plant a Mango Tree.

Largest and healthiest Plumeria I have ever seen in Arizona!
The resident rescued pot bellied pig and her piglets!
A Tropical Concept friendly employee (the handsome bearded human, not the Macaw)
helping out a customer at the tour in September.
The exotic birds that will be visiting during this Saturday's tour!
A Tropical Concept is giving another tour this Saturday, and raffling off 2 Starfruit plants!
A Tropical Concept Tour/Demo/Raffle/Birds - Saturday, October 28 at 11 AM - 1 PM - tour at 11:00am. Since winter is coming, we are going to demonstrate a couple of ways to protect your trees from the winter cold. Then a 7gal starfruit and 3g starfruit  will be raffled off.  So come and mingle and talk birds/plants, and have some cold beverages. Feel free to bring the family, your kids will love it.  Feel free to bring your parrots or birds to the event and show them off. Randal Allyn from Az Exotic Bird Rescue will be bringing some of their birds they have, its going to be great!  A Tropical Concept Plant Nursery, 4302 S Central Ave, Phoenix, Arizona 85040
Passion Fruit flowers!  Big and beautiful :-)

Happy geese and ducks at home in their pond.
For a couple of years now I've been working up the courage to try to grow tropicals.  I slowly built up my wish list after seeing what Jay Barringer grows in his food forest, and watching his videos.  Kim's no-nonsense approach to planting and caring for tropicals has encouraged me to take the plunge!  When I called A Tropical Concept with my wish-list I figured they would have maybe 2 or 3 out of the 4 plants on my list, since I was looking for very specific types of mango.  They had ALL of them!
My recent purchases from A Tropical Concept - 1 Miracle Mango, 1 Pineapple Pleasure Mango, 1 Pineapple Guava, and 1 Black Sapote!
My hard-working brother Patrick planting our new Miracle Mango
in our north facing atrium, surrounded by star jasmine and
arabian jasmine.
The Pineapple Pleasure Mango went into a pre-dug hole in
an area that gets morning sun and is protected from wind.
The Black Sapote will be planted under filtered light, surrounded by
other trees to protect it from afternoon sun.

My new Pineapple Guava will go into a pot for now,
until I figure out where it wants to live in my
increasingly crowded backyard jungle ;-)
I bought these 3 weeks ago and they are all doing very well!  Thank you Kim and Danny for all of your help!!!

Tuesday, October 24, 2017

October Harvest

Today's harvest, clockwise from top - Swiss Chard, Moringa drumsticks, Purple Hyacinth Beans, Wolfberries, Anaheim Peppers, tiny but mighty Chiltepen Peppers, and Malabar Spinach!

Purple Hyacinth Bean Vine - pick pods when they are small,
full grown pods are toxic!

Dragonfly in the garden, bug hunting!

Egyptian Spinach going to seed.  Pick pods when they are small
and easily bendable, otherwise they are woody. Cook in vegetable
broth, or cook as you would okra, or steam.

Queen Butterfly on Milkweed

To be harvested later - Luffa Gourds!
Luffa gourds!

Luffa flowers :)

Sweet Potatoes!


Thursday, October 12, 2017

The Bee Oasis - Permaculture in Action!


The Bee Oasis garden in transition from summer to a fall garden,
along with a solar oven in foreground!
A few weeks ago I was fortunate to attend one of The Bee Oasis workshops, led by permaculture guru of the east valley - Don Titmus.  His home is a great example of living a sustainable lifestyle, which we can and should all learn from.  Don is a master at sharing his practical knowledge and explaining the principles of permaculture.
Overturned metal mesh waste baskets from the dollar store serve as cloches
to protect young plant starts.  What a great idea!
Don has 40 years of experience in horticulture and has lived in Arizona since 1981.  With 14 years of experience in Permaculture (teaching, design, consults and implementations) he is your man if you need a consult on how to set up or improve your garden, lay out a home fruit orchard, or to implement rainwater harvesting features.  As Don puts it - he's out to help heal the Earth one home-site at a time!! I can hardly think of a more noble pursuit.
A sturdy set of hand made tools at
the ready to prepare the fall garden beds.
Don demonstrated his method of prepping fall garden beds, using a "low-till" instead of "no-till" method.  He loosened up just the first six inches or so of the soil before adding amendments, allowing nutrients to get down into the soil without disturbing the beneficial micro-organisms living happily in their own levels within the soil.  I like this concept and am giving it a try in my fall garden beds. 

Hanging herb drying rack with velcro closure, lets air in and keeps
bugs and birds out.
 The fall garden prep demo was followed with a great presentation indoors on the principles of Permaculture.  I love networking with other organic gardeners and got to chatting with two from Aravaipa Canyon - home of the infamous 100-plus years old Aravaipa Avocado tree.  Interestingly, they had also tried to grow one of the off-springs of this tree, and failed.  
Other interesting tidbits of information I picked up were that -

Arbico Organics sells worm castings by the truckload!

Maricopa County Cooperative Extension offers free soil and water testing!

Using black strap molasses in your compost speeds up the composting process!

Rainwater harvesting tank at the Bee Oasis collects water from the
home's metal roof for use in the garden, with overflow going to a
nearby lush shade garden.
The next Bee Oasis workshop is on Rainwater Harvesting.  Participants will get to see firsthand how Don installed his rainwater tank and how he incorporated berms and swales into his landscape to slow the rainwater and allow it to soak into his soil rather than letting it run off into the street!

Homestead Garden Series - Rainwater Harvesting, Saturday, October 14 at 8:30 AM - 11:30 AM - Sustainable strategies for Harvesting the rain for garden and homestead resilience. From the top of your watershed.....Slow it, Spread it, Sink it. Store in the soil or in tanks for later, all this and more are demonstrated at the Bee Oasis.
The Bee Oasis holds classes monthly and has great upcoming topics -
2017
November - Soil Building
December - Pc Sectors [with a focus on cold/chill/freeze]
2018
January - Composting and more
February - Spring Garden, plan and prep
March - Bee Blocks for Pollination and the Natural Mozzie Trap.
April - Chickens and more
May - Climate, Microclimates and Inner climate
June - Garden Shading and more


Tuesday, September 19, 2017

Sage Garden at EcoVillas Olive Harvest


Jason Trotter of Sage Garden EcoVillas giving us the basics
about growing and harvesting olives in Arizona
On Saturday September 9th, Jason Trotter of Sage Garden EcoVillas kindly opened his yard and home to hold a workshop on how to pick, cure, and finish olives. There was a great turn-out for the olive harvest, everyone young and old, curious to learn how to harvest these little gems.  Some had made the mistake (like me) of picking an olive fresh from a tree and taking a bite - DON'T!  It won't kill you, but your taste-buds will be very unhappy.  Olives fresh off the tree, green or black, are extremely bitter.

Olive tea was available to sample.  Made from the
olive tree leaves, it has a nice mellow flavor.


Tarps were laid out to catch the falling olives and attendees jumped right in on picking the olives using small plastic rakes attached to extension poles.  Even the youngest gave harvesting a try!
It was great to have such a family-friendly event.  These kids did a great job harvesting, learned where olives come from (not just from a jar), and had fun outdoors instead of being glued to a screen (computer, tv, phone, tablet).


It turns out that both black AND green olives come from the same tree.  The black ones are just riper than the green ones.  Accordingly, the green olives need to be cured longer than the ripe black ones in order to remove most of the bitterness. 


The black and green olives were separated into 2 different buckets for curing.  In the curing process you keep the olives submerged in water and check each day to see if they are ready for finishing.  After about a week you move on to the finishing process where the olives are soaked in a brine.  For details and recipes, check out Sage Garden's FB page, or attend the next workshop!

 There is another Olive Harvest Workshop on Saturday, Oct. 7th from 9:00 a.m. to 11:30 a.m.  Participants will be picking both green and black olives, preparing them for curing, and starting the curing process.  Sign up on FaceBook at 
EcoVilla's Olive Harvest Workshop


Olives: Finishing Recipe courtesy of Sage Garden Ecovillas

http://www.sagegardenecovillas.com/

This recipe covers just the finishing process.  Before finishing, the olives should be cured, to remove the bitter chemicals that naturally occur in them.

Materials:
 - Air-tight heat-tolerant containers (such as canning jars)
   - I always use at least one small-sized jar (4 or 8 oz) for tasting
 - Stock pot or sauce pan
 - Stirring spoon

Ingredients:
 - Cured olives
 - 1 gal water
 - 1 lb (or 1 1/2 cu) non-iodized salt (such as pickling salt, sea salt, or kosher salt)(or 1 1/2 cu)
 - 2 cu vinegar (I prefer malt vinegar), can substitute 1 1/3 cu lemon juice
 - Olive oil (optional)

Steps:
 - Place the cured olives in the containers.  Leave at least 1/2 inch of space at the top of the containers.
 - Start heating an amount of water equal to half the volume of olives.  If your olives fill a gallon jar, you'll need 2 quarts of water.
 - Add salt and vinegar (or lemon juice) using the proportions above.
 - Stir until the salt is dissolved
 - I continue heating the water until about the time when "steam" is visible.
 - Pour the hot finishing solution into the containers of olives.
 - Optionally, you can add a layer of olive oil on top.  Note that the olive oil will solidify when refrigerated and it will look like a layer of wax.  This is normal.
 - Close the containers and keep refrigerated.
 - After one week, I open a small container and taste the olives.  If they are too bitter, I cure them further:
   - Leave at room temperature for 1 - 2 weeks to cure further.
   - Empty and replace the finishing solution, re-seal, and refrigerate

For the Kalamata Style Recipe see Sage Garden FB page  


Thursday, August 31, 2017

Summer Harvest 2017 - Epic Fail!


Everything in my summer garden seemed so promising in May.
The zucchini plants were spreading and budding -


The squash plants had big beautiful blooms - 


The passion fruit vines were flowering and already had a few fruit -


My Red-Flame and Thompson Seedless grape vines had survived the bout of powdery mildew and were loaded with their first year grape clusters.

My carefully selected tomato starts that I grew from seed indoors, of varieties that I knew would produce here in the desert - Super Souix, Pineapple tomato, Stupice, Cossack Pineapple Tomatillos, and Cuastralee Beefsteak tomatoes had hardened off well and were starting to set fruit.

Though quite ugly and hogging up space, my volunteer Matt's Wild Cherry tomatoes were constantly producing.
But as the heat of summer set in, the bugs and countless other critters came out, and they behaved as though they were simultaneously starving and dying of thirst.  Anything containing moisture got eaten.  The grapes seem to be abducted by aliens overnight - they were small low-flying creatures with feathers, remarkably similar to what we here on earth call "birds".
We tried everything possible to keep the alien birds from our tomato bounty - scare tape, bird netting, taffeta bags,  jingling wind chimes, the fake owl, surly looking garden gnomes and even the neighbors cat.  Nothing worked.
To add to the agony, by June the tomato plants started suffering from curly top virus.  So one by one they were removed in a futile effort to thwart the spread of the disease.  My pepper plants in a nearby bed produced nothing but little mutant peppers.  I now know it was likely due to the curly top virus, likely spread to my peppers by beet leafhoppers (left here by the aliens who abducted my grapes).
Yields were extremely low from all the summer veggies I planted - cucumbers, zucchini, squash, okra, peppers, and tomatoes.  I'm still holding out hope for the watermelon and eggplants.  The passion fruit vines, with over 40 blooms only produced 3 fruit!  The acerola cherry bloomed and bloomed and is still blooming but has never set fruit.  One would think that I didn't have enough pollinator-attracting plants, but that wasn't the case.  The garden is still full of flowering basil, wild sunflowers, borage, lantana, and in early summer had blooming citrus buzzing loudly with bees, nasturtium vines, bee balm, calendula, marigold and hollyhocks.
So, as in life, things don't always go as planned and we must look at the positive side of things.  My garden successes were that all of my young fruit trees survived the summer - peaches, apples, plums, mandarin orange, bearrs lime, and mulberries.  The pomegranate has a ton of fruit. Other successes were -
My bee balm plants were gorgeous!
 

My 3 year old lavender bush bloomed for the first time!


My Red Chard lasted well into July, protected by big bushes of basil, peanut plants, and a few okra stalks.

My Moringa trees are doing great, producing tons of pods to eat, and more leaves than I can ever consume.
My sweet potato vines and malabar spinach are sprawling out everywhere, providing lots of leafy greens for salads.
While being trapped inside because of the sweltering heat, my wild sunflower jungle has provided us with endless hours of entertainment watching the goldfinches feeding on the seeds.

Now that is one happy bird!


So what have I learned from my summer garden debacle?  That it's just too dam hot in the summer for me to properly tend to so many plants.  Even with my night owl, Bugzooka-carrying brother patrolling the garden late into the wee hours.  Next summer I will stick with easy heat-loving plants that need little attention such as sweet potatoes, malabar spinach, egyptian spinach, and okra.  My focus will be on my fruit trees, herbs, and vines, and just a few hardy perennials like artichokes, tree collards, and gherkin cucumbers.